This post is (also) available in: NederlandsFrançais
Note: for curators and belga.share newsroom users only
Introduction
In response to many requests, we have revamped our contact management system. Your existing contacts and contact groups remain available, of course, but we are adding a host of new features!
As a curator or press release distributor, you can now store much more information for each contact, centrally organize contacts within your organization, and use custom tags to organize and compile your contacts and contact groups more quickly.
We are doing this to help you reach your readers effectively—whether via a press release using Share, a newsletter, a live feed, a label, or simply by sharing posts. In this section, we explain how to easily manage your readers/contacts, organize them into lists, and use tags to streamline your workflow.
Previously, contact management was located under ‘Settings’. While those links are still there, we now guide you to a dedicated contact management section under ‘Publish’ or ‘Share’, depending on whether you are a curator or a user of a belga.share newsroom.

Contacts
You can find all your contacts under ‘Contacts’. Belga.press users within your organization automatically populate your list (you cannot delete these entries; users who are no longer active or listed in our back office are automatically removed from your list). Such contacts are marked with the label ‘ORG’. Non-organizational contacts are marked with the label ‘EXT’ (for external).
Use the search feature to easily locate contacts, or use the available filters—by contact type, contact group, or tags—to quickly narrow down your list. You can also quickly filter by personal contacts and contacts shared with other users in your organization (specifically, users who have access to contact management).
Use the ‘Export CSV’ button to export all your contacts to a CSV file.
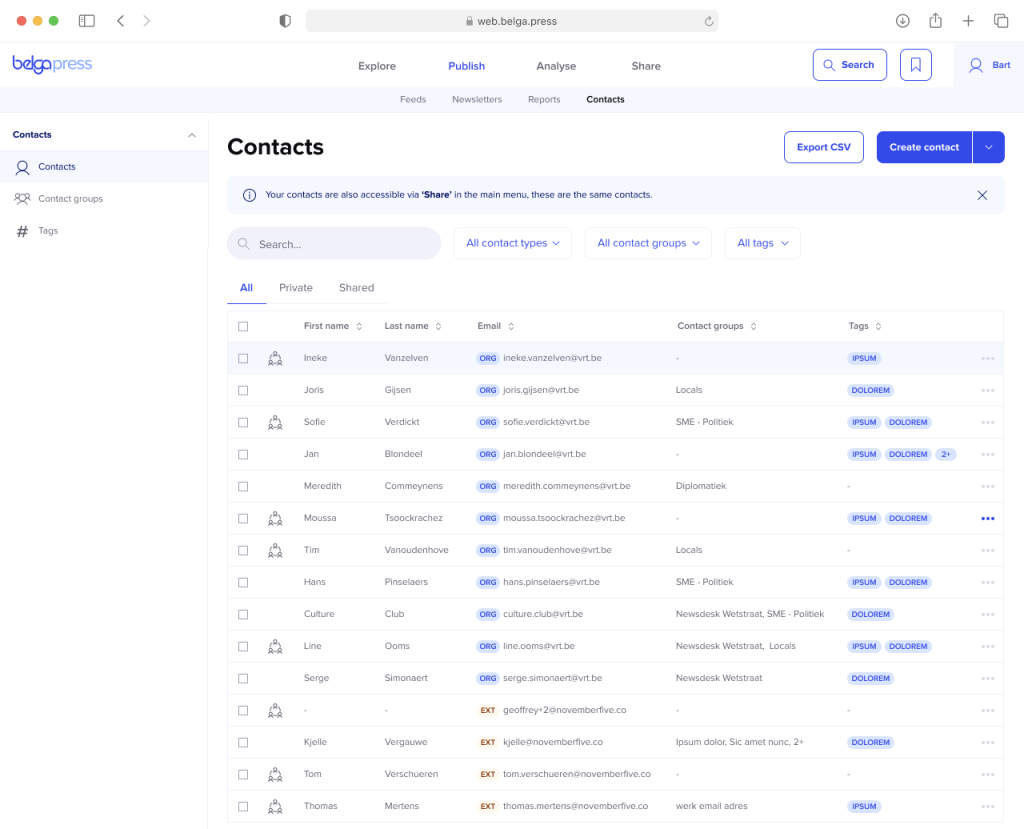
You can add new contacts via ‘create new contact’. To upload in bulk, click the ‘v’ button and select that feature (see more on this later in this section).
Manual creation
If you choose to create a new contact manually, you are taken directly to the detailed contact record.
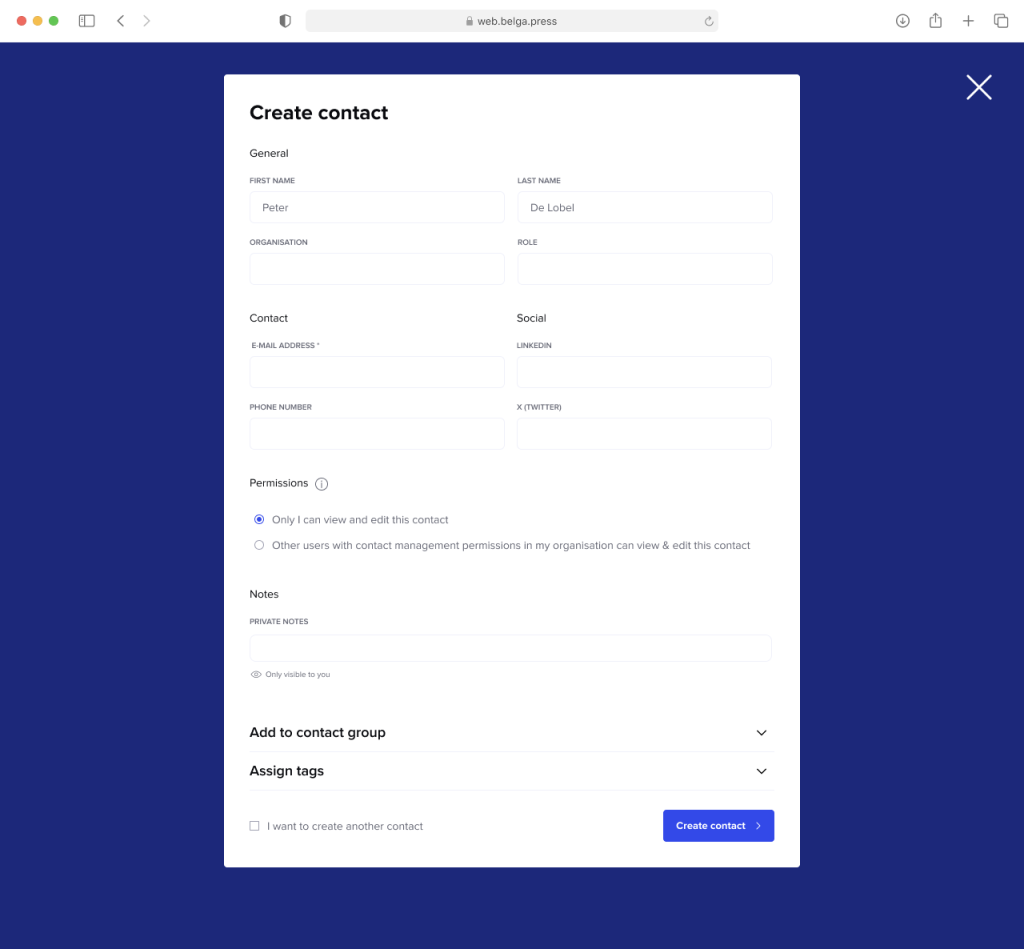
Of all the general fields displayed, you must at least enter the email address. The other fields are optional.
You can use the permission settings to decide whether to keep a contact private or share it within your organization. For a PR agency, for example, it might be appropriate to share all contacts. Depending on your choice, you can add either a private or a shared note.
Further down in this record, you can assign your contact to one or more contact groups. This step is optional. Choose from the existing list of contact groups or create a new one right away.

Finally, you can assign one or more tags to your contact. This step is also optional. Tags are a set of keywords defined and managed within your organization, allowing you to organize your contacts as you see fit. In the screenshot below, we are creating a new tag called “MEDIA.”

Finally, click ‘create contact’. Your contact will then be created, and you will be returned to the overview. If you wish to create another contact, check the ‘I want to create another contact’ box before creating it; this will take you to a blank contact form.
You can edit any contact from the overview by clicking the three dots. This opens a menu with various options, each taking you directly to the action you want to perform.

Editing multiple contacts
You can also choose to edit multiple contacts at once. To do this, use the checkboxes to the left of each contact. Once you have selected multiple contacts, you can collectively add tags, assign them to contact groups, or delete them (provided they are not active organization users).

Bulk upload of new contacts
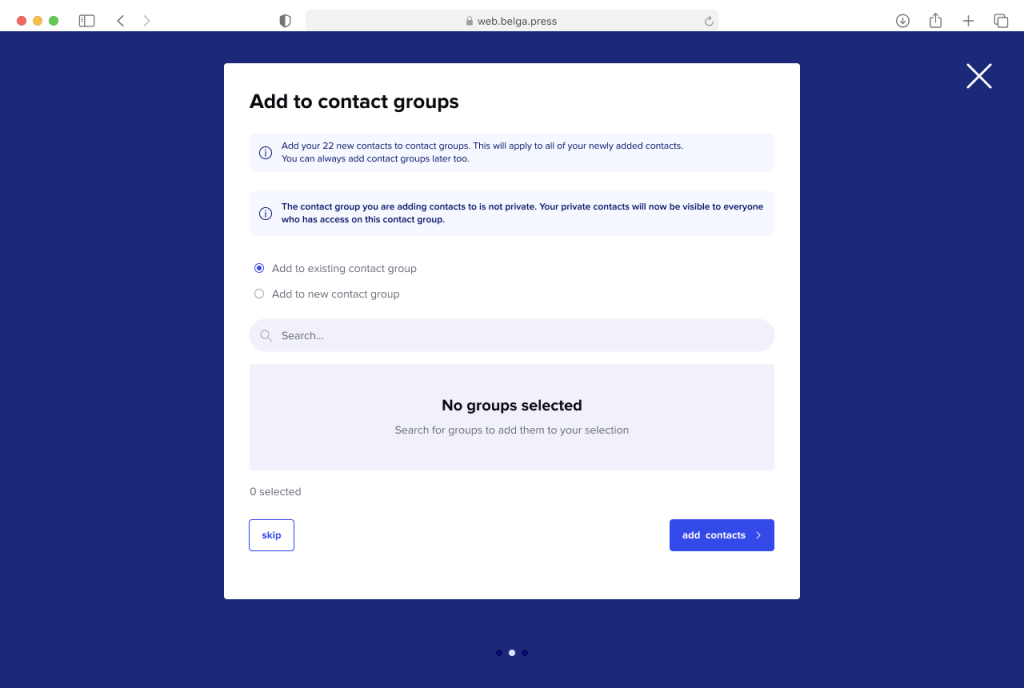
For the bulk upload via CSV, you can use the template we have provided; this ensures you use the correct format right from the start. After uploading, you can choose to immediately add contacts to one or more contact groups. The system detects duplicates during the import process.
Bulk import is limited to contact details and assignment to contact groups. If you wish to quickly add tags to these contacts afterwards, please use the features for editing multiple contacts described above.

Contact groups
Click ‘contact groups’ to view an overview of all your contact lists. These can be lists you created yourself or lists that have been shared with you. Shared lists are marked with a distinct icon. Click on a list to manage the contacts within it. You can also delete a contact group directly using the three-dot menu.
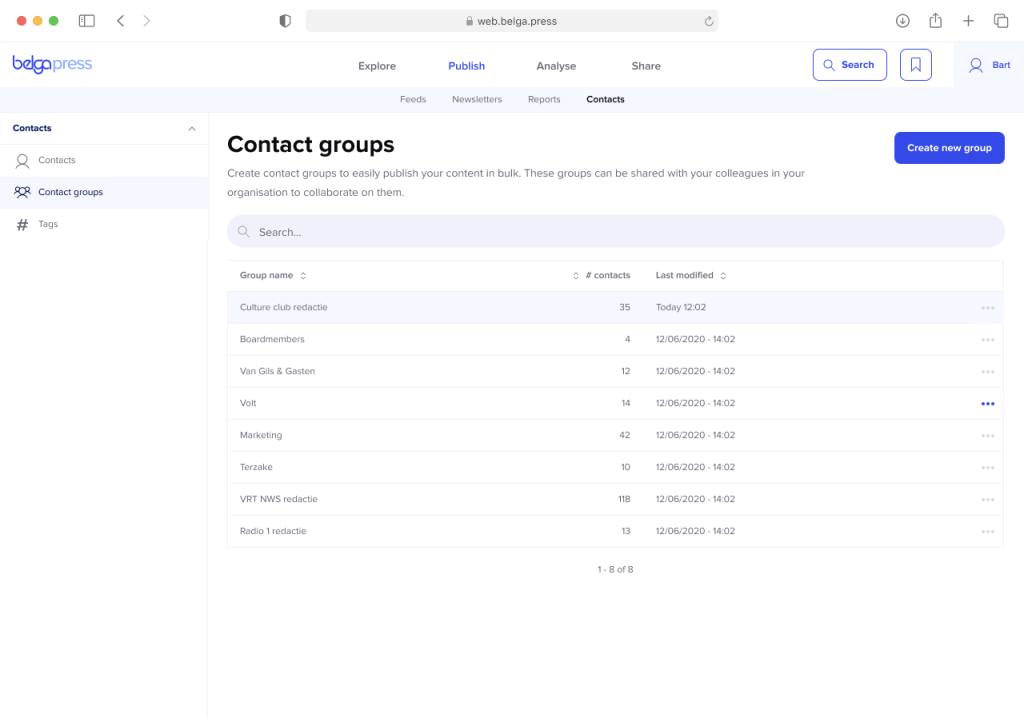
Click on an existing contact group to edit it, or create a new one using the blue button at the top right.
Creating a new contact group
After clicking ‘create new group’, the first step is to name your contact group.

Next, you add contacts to your list. You can do this in several ways: either by adding them manually one by one, or by making effective use of tags.
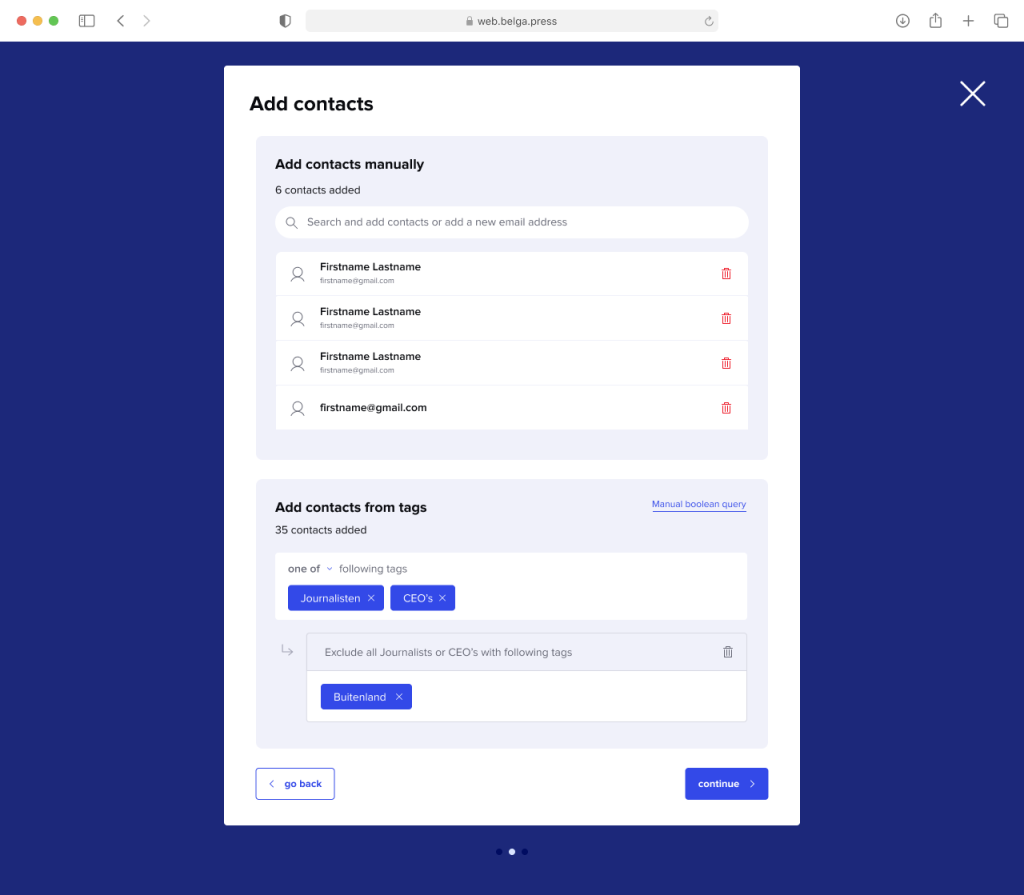
Tags allow you to select either a broad or a more specific group of contacts. For instance, based on the screenshot above, you can select all contacts tagged ‘Journalism’ or ‘CEO’s’ while excluding those who also have the ‘International’ tag. If you choose ‘all of’ instead of ‘one of’, you limit your selection to only those contacts who possess all the specified tags.
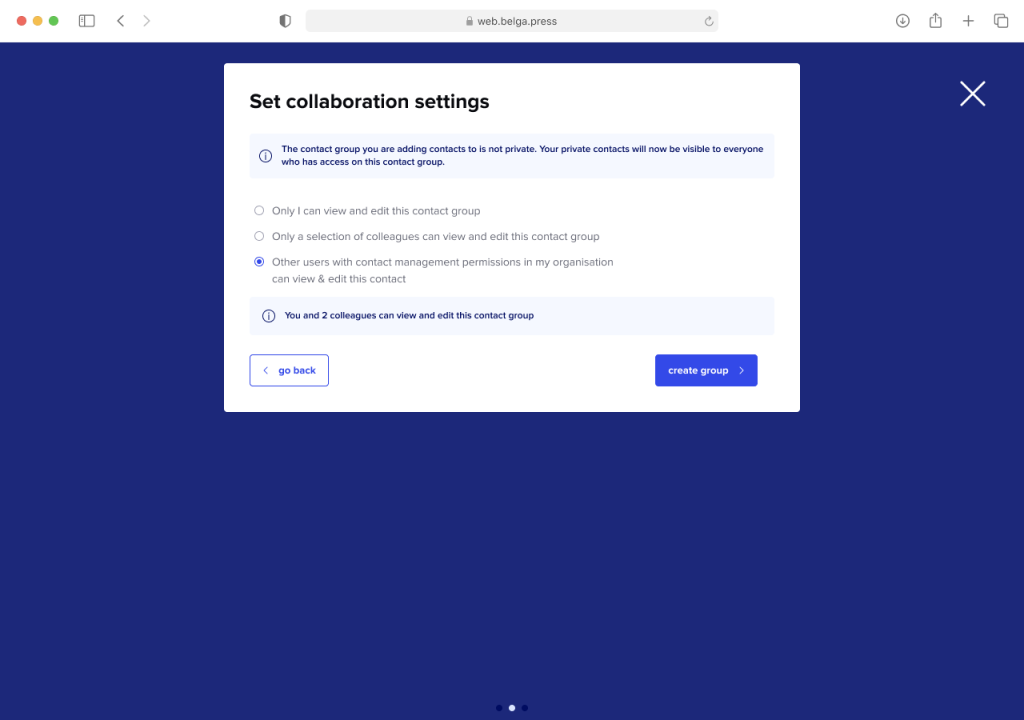
In the final step, you decide whether or not to share your contact group. If you wish to share it, you can do so by specifying the exact colleagues with whom you want to share it. Another option is to share it only with users in your organization who have contact management permissions. This latter option is particularly useful when working with large numbers of people, where it may not always be clear who is still active within the organization. Finally, click ‘create group’ to create it. Once created, the list will appear in your overview.
Editing an existing contact group
You will find all contacts within each list. Use the search bar or filters to locate or narrow down contacts more quickly. To edit a single contact, click on the contact or use the three dots next to it. Want to edit multiple contacts at once? Select the checkboxes for each contact and use the bulk actions in the blue bar at the bottom.
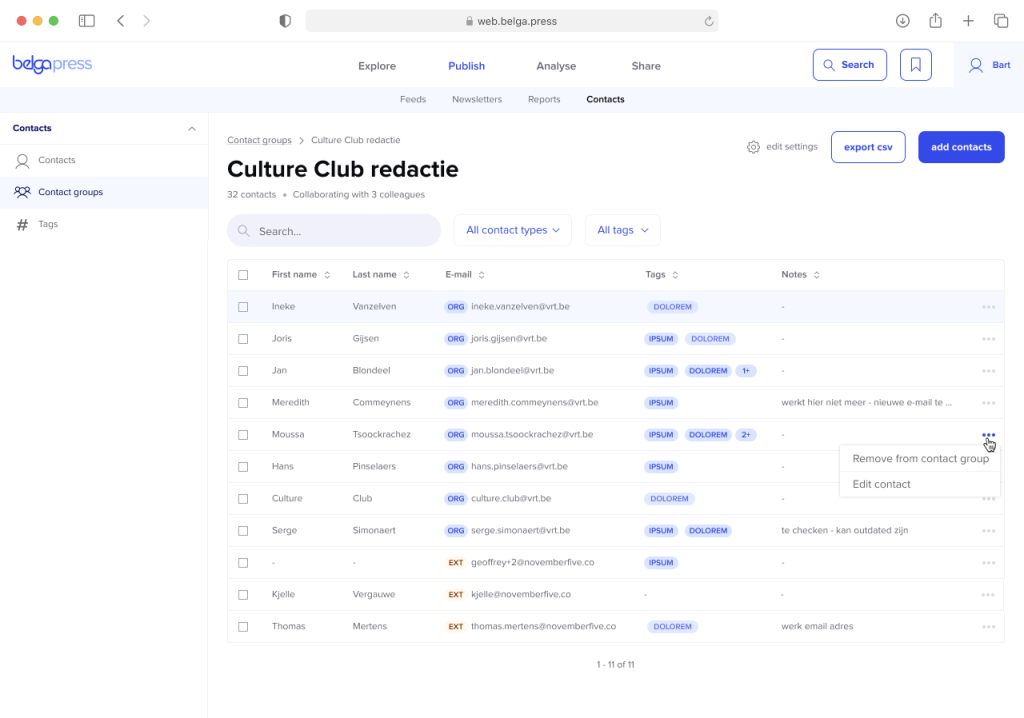
Via ‘edit settings’, you can change the name of your contact list, delete it, and choose to share your list with other users.

You can add new contacts to your existing list via ‘add contacts’. This takes you to the same screen described for creating a new contact list.
Finally, you can choose to export all contacts within a contact list. To do this, select the ‘export csv’ feature.
Tags
Tags allow you to organize your contacts more effectively. You decide entirely which tags to use. Please note: tags exist at the organization level. Choose carefully which tags to use, as they are visible to everyone in your organization with access to contact management.
To prevent an uncontrolled proliferation of tags, we do not grant this feature to everyone with access to contact management. Even if you do not have permission to manage tags, you can still assign them to contacts; however, only the tag administrator can edit the list.
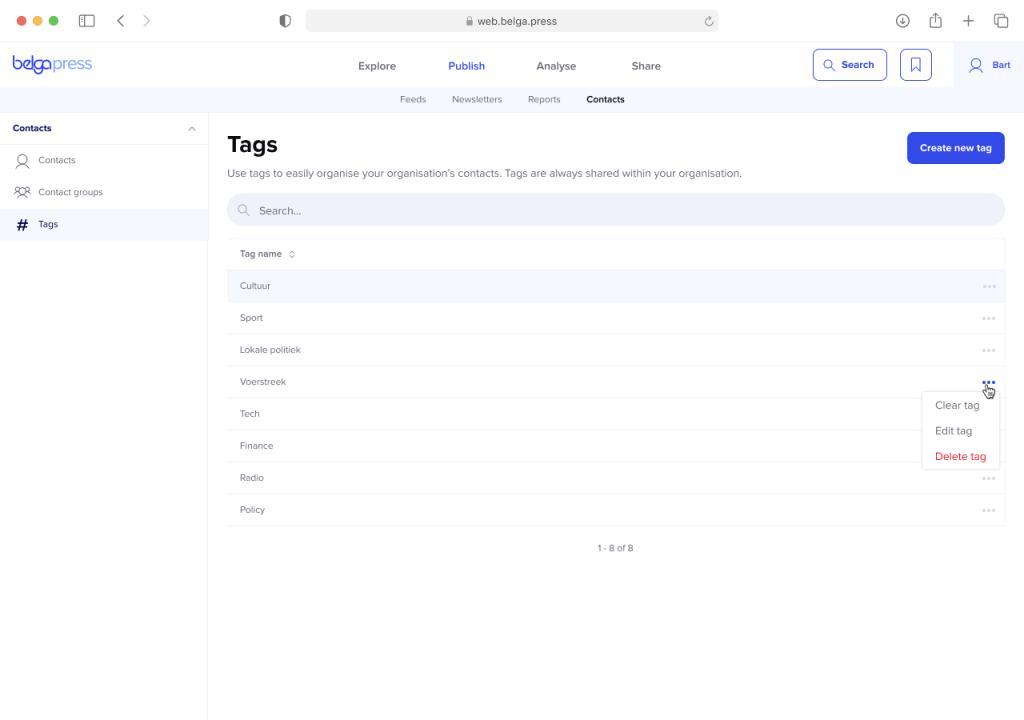
Managing tags is simple. You can add a new tag to the list using the ‘Create new tag’ option.

Once created, it appears in the list. You can search for tags using the search bar. The three dots next to each tag allow you to edit (rename), delete, or ‘clear’ it. The ‘clear’ option removes the tag from all contacts associated with it in a single action.